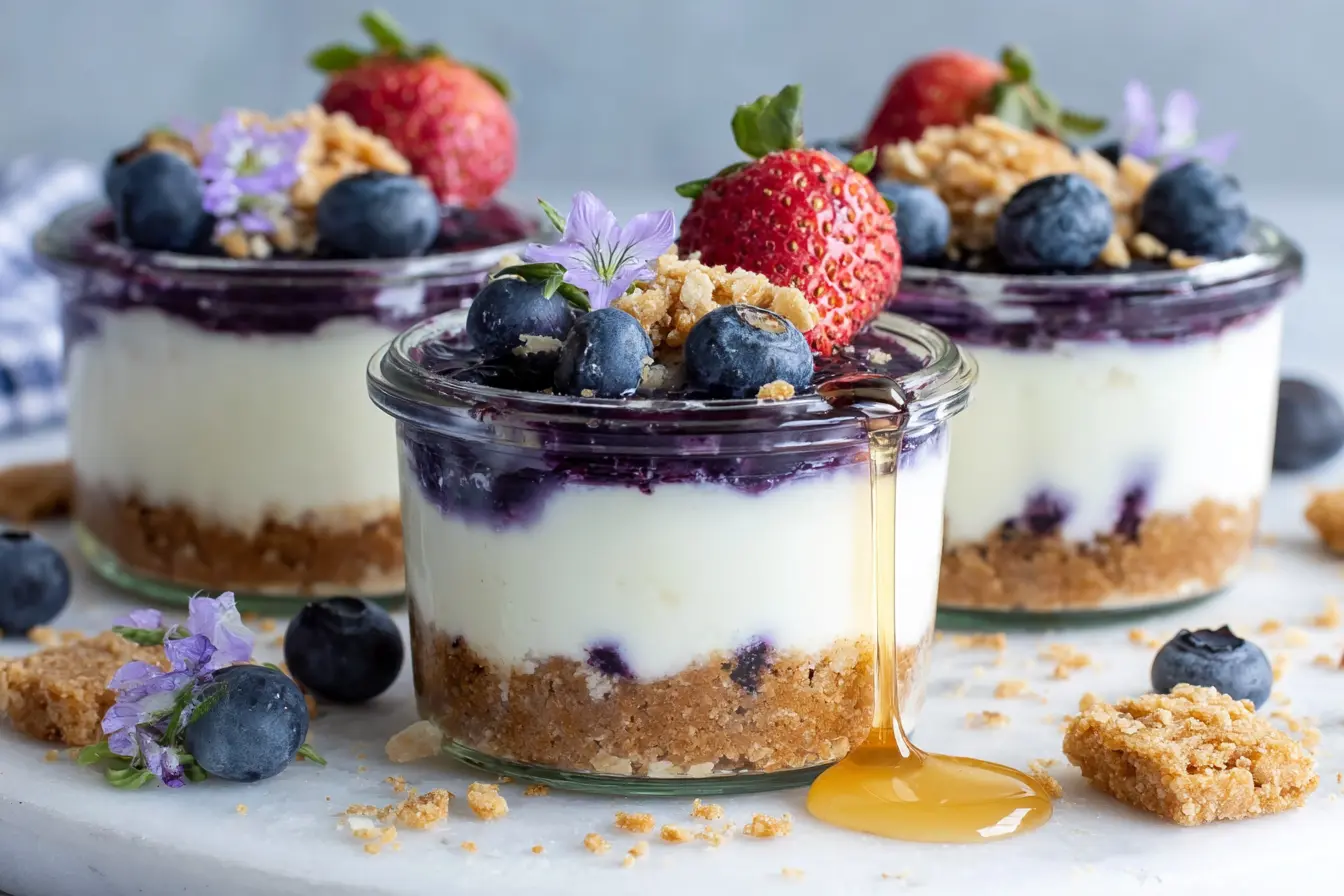
No Bake High Protein Cheesecake Cups
Cheesecake has a reputation. Rich, indulgent, the kind of dessert that requires either a springform pan and two hours of your life or a drive to the nearest Cheesecake Factory. These no bake high protein cheesecake cups exist to dismantle that reputation entirely. Creamy, tangy, genuinely cheesecake-flavored and assembled in about fifteen minutes with no oven, no water bath, no crossing your fingers while it cools on the counter hoping it does not crack.
Each cup contains approximately 15-20g of protein, depending on the ingredients used. Which means dessert can also be the most useful meal of the day. That is nothing.
Why You’ll Love This Recipe
Classic Cheesecake Flavor Without the Effort
The filling is built around cream cheese and Greek yogurt which together create that signature tangy creaminess that makes cheesecake what it is. The protein powder adds structure and protein without changing the flavor in any noticeable way if you use vanilla it actually enhances the overall sweetness in a way that feels intentional rather than supplemental. Nobody is going to bite into one of these and think about macros. They are going to think about cheesecake.
High Protein and Actually Satisfying
Most desserts leave you wanting more of the dessert. A high protein dessert that is also genuinely filling is a rarer thing than it should be. The combination of cream cheese fat, Greek yogurt protein, and whatever protein powder you use creates something that satisfies both the craving and the hunger simultaneously — which is the whole point of building protein into a dessert in the first place.
No Bake and Ready in 15 Minutes
No oven. No mixer required if you let the cream cheese come to room temperature properly. No chilling for four hours before you can touch them thirty minutes in the refrigerator is enough to set the filling to a sliceable, scoopable consistency that actually holds its shape in the cup. Fifteen minutes of active work. Thirty minutes of passive waiting. Done.
Ingredients You’ll Need
The Cheesecake Filling
- 8 oz cream cheese, room temperature (full fat for best texture and flavor)
- 1/2 cup plain Greek yogurt (full fat or 2%)
- 1 scoop vanilla protein powder (approximately 25 to 30g)
- 2 tbsp honey or maple syrup
- 1 tsp vanilla extract
- 1 tbsp fresh lemon juice (adds that classic cheesecake tang)
- Pinch of salt
The Crust Layer
- 1 cup graham cracker crumbs (about 8 full crackers crushed)
- 3 tbsp melted butter
- 1 tbsp honey or maple syrup
- Pinch of salt
Topping Ideas
- Fresh strawberries, blueberries, or raspberries
- Lemon curd for a citrus forward version
- Melted dark chocolate or chocolate ganache drizzle
- Crushed graham crackers for extra crunch on top
- A dollop of almond butter or peanut butter swirled in before chilling
How to Make No Bake Protein Cheesecake Cups
Step 1 — Make the Graham Cracker Crust
Crush the graham crackers into fine crumbs a zip-lock bag and a rolling pin works perfectly well and is oddly satisfying, or a food processor if you want to feel more official about it. Mix the crumbs with melted butter, honey, and a pinch of salt until the mixture looks like wet sand and holds together when you press a small amount between your fingers. Divide evenly between 6 small cups, jars, or ramekins and press firmly into the bottom with the back of a spoon or the bottom of a small glass. Set aside while you make the filling.
Step 2 — Make the Protein Cheesecake Filling
This step is where room temperature cream cheese matters enormously — cold cream cheese will not mix smoothly and you will spend ten minutes fighting lumps that should not exist. In a large bowl, beat the room temperature cream cheese with a hand mixer or a sturdy whisk until completely smooth and no lumps remain. Add the Greek yogurt, protein powder, honey, vanilla extract, lemon juice, and salt. Mix until fully combined and the filling is thick, smooth, and glossy. Taste it. Adjust the sweetness with a little more honey if needed, or add another squeeze of lemon if you want more tang.
Step 3 — Assemble the Cups
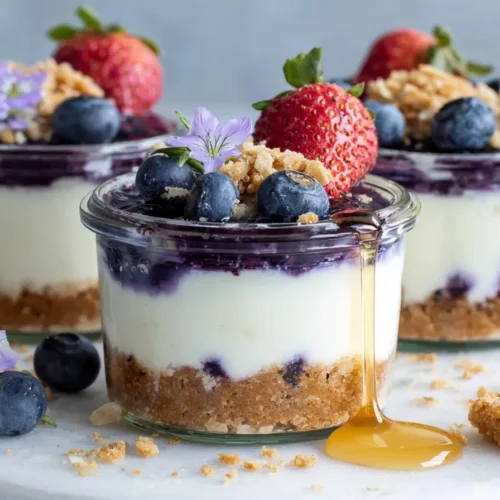
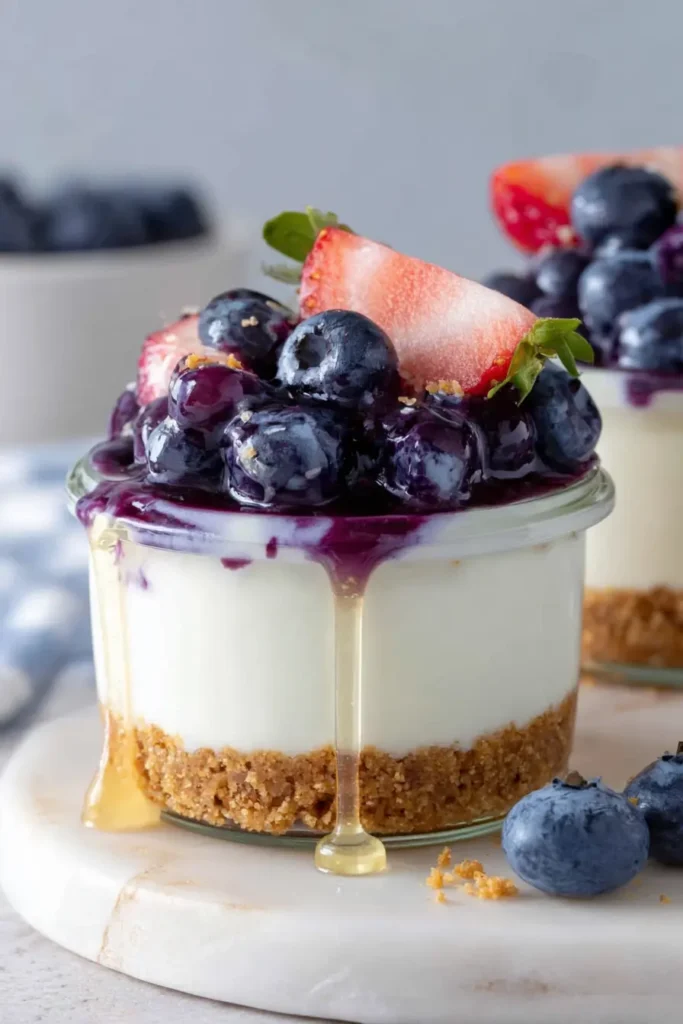
Spoon or pipe the cheesecake filling into each cup over the graham cracker crust. A piping bag or a zip-lock bag with the corner snipped makes this look considerably more polished than a spoon, but a spoon works fine and nobody is grading presentation at home. Smooth the tops with the back of a spoon. Add toppings now if using fresh fruit, or wait until after chilling if using anything that might bleed color into the filling.
Step 4 — Chill and Serve
Refrigerate for a minimum of 30 minutes before serving; an hour is better if you have the time. The filling firms up considerably in the cold and goes from a thick batter consistency to something that genuinely resembles a sliced cheesecake in texture. Add any remaining toppings right before serving. These are best eaten cold, straight from the refrigerator.
No Bake High Protein Cheesecake Cups
Equipment
- Hand Mixer or Stand Mixer
- 6 Small Cups, Jars, or Ramekins
- Mixing Bowl
- Zip-Lock Bag or Piping Bag
Ingredients
The Graham Cracker Crust
- 1 cup graham cracker crumbs about 8 full crackers crushed fine
- 3 tbsp unsalted butter melted
- 1 tbsp honey or maple syrup
- 1 pinch salt
The Cheesecake Filling
- 8 oz cream cheese room temperature, full fat for best texture
- 1/2 cup plain Greek yogurt full fat or 2%
- 1 scoop vanilla protein powder approximately 25 to 30g, casein preferred for best texture
- 2 tbsp honey or maple syrup adjust to taste
- 1 tsp vanilla extract
- 1 tbsp fresh lemon juice adds classic cheesecake tang
- 1 pinch salt
Toppings (Optional)
- fresh strawberries, blueberries, or raspberries add immediately before serving
- crushed graham crackers for extra crunch on top
- melted dark chocolate or almond butter for drizzling
Instructions
- Crush the graham crackers into fine crumbs using a zip-lock bag and rolling pin or a food processor. Mix with melted butter, honey, and a pinch of salt until the mixture resembles wet sand and holds together when pressed. Divide evenly between 6 small cups or jars and press firmly into the bottom. Set aside.
- In a large bowl, beat the room temperature cream cheese with a hand mixer until completely smooth with no lumps — this step is critical so do not rush it. Add the Greek yogurt, protein powder, honey, vanilla extract, lemon juice, and salt. Mix until fully combined and the filling is thick, smooth, and glossy. Taste and adjust sweetness or tang as needed.
- Spoon or pipe the cheesecake filling evenly over the graham cracker crust in each cup. Smooth the tops with the back of a spoon. Add any toppings that will not bleed color into the filling now, or wait until after chilling for fresh fruit.
- Refrigerate for a minimum of 30 minutes before serving — 1 hour is better, overnight is best. The filling firms up considerably as it chills. Add fresh fruit and any remaining toppings immediately before serving.
Notes
What Makes This Cheesecake High in Protein
Greek Yogurt vs. Cream Cheese Ratio
Traditional cheesecake is almost entirely cream cheese which is high in fat and relatively low in protein. Swapping half the cream cheese for Greek yogurt shifts that balance significantly Greek yogurt brings roughly 17g of protein per cup compared to cream cheese which brings about 2g per ounce. The flavor difference is minimal because the cream cheese still dominates the flavor profile. The protein difference is not minimal at all.
Which Protein Powder Works Best
Vanilla casein protein powder is the gold standard for cheesecake filling. It is thicker and slower-digesting than whey which gives the filling a denser, creamier texture that behaves more like actual cheesecake. Vanilla whey works well too — slightly thinner texture but still excellent. Avoid unflavored if possible since the filling needs that vanilla baseline to taste like cheesecake rather than just cream cheese. Collagen peptides are an option if you want a protein boost without any flavor contribution at all — they dissolve completely and add roughly 9g of protein per scoop without changing the taste.
How to Push the Protein Even Higher
Add two tablespoons of cottage cheese blended smooth directly into the filling alongside the Greek yogurt. Swap the honey for a sugar-free sweetener to reduce carbs. Use a higher protein Greek yogurt brand some brands push 20g of protein per cup which makes a meaningful difference per serving. A tablespoon of hemp seeds folded in at the end adds another 3g per serving and virtually no flavor.
How to Get the Perfect Creamy Texture
Why Room Temperature Cream Cheese Matters
Cold cream cheese does not incorporate smoothly. Full stop. Even thirty seconds of mixing cannot eliminate the tiny cold lumps that form when you try to beat refrigerator-cold cream cheese into a smooth filling. Take it out of the fridge at least an hour before you start. If you forgot and this happens microwave in 10-second intervals until it gives slightly when pressed but is not warm or melted. Warm cream cheese breaks and becomes greasy. Room temperature cream cheese is the target.
How Long to Chill Before Serving
Thirty minutes minimum. One hour is noticeably better the texture goes from soft and mousse-like to firm and dense in that extra half hour and it is a meaningful improvement. Overnight is the best result of all the flavors meld, the filling sets completely, and you essentially have individual cheesecakes waiting in the refrigerator for you in the morning which is a genuinely excellent thing to discover.
Common Texture Mistakes and How to Fix Them
Filling too runny the cream cheese was too warm or the protein powder was not fully incorporated. Refrigerate for longer and it will firm up. If it is still loose after an hour, the protein powder ratio is probably off add another half scoop next time.
Filling too dense and dry the protein powder absorbed too much moisture. Add a tablespoon of Greek yogurt and mix again to loosen. Different protein powders absorb at different rates so the first batch with a new brand is always a calibration exercise.
Lumpy filling — the cream cheese was too cold. There is no fixing lumps after the fact beyond blending the entire filling with an immersion blender which works but is annoying. Room temperature cream cheese from the start is always the answer.
Topping and Flavor Variations
Fresh Fruit Toppings
Strawberries are the classic and they are classic for good reason the acidity cuts through the richness of the filling and the color is visually striking against the white cheesecake. Blueberries, raspberries, and sliced peaches all work equally well. A quick berry compote made by simmering fresh or frozen berries with a teaspoon of honey for five minutes makes an excellent sauce that looks considerably more intentional than raw fruit scattered on top.
Chocolate and Peanut Butter Variations
Swap the vanilla protein powder for chocolate protein powder and add a tablespoon of cocoa powder to the filling for a chocolate cheesecake version that is genuinely excellent. Swirl a tablespoon of peanut butter into the top of each cup before chilling for a peanut butter cheesecake situation that borders on unreasonable. Top with mini chocolate chips and a drizzle of melted dark chocolate for a version that nobody will believe has protein in it.
Seasonal and Holiday Versions
Pumpkin puree and pumpkin spice stirred into the filling makes a fall version that works from September through Thanksgiving. Crushed Oreos in the crust instead of graham crackers with a chocolate filling is a cookies and cream version that disappears faster than any other variation. Lemon curd swirled on top with fresh blueberries is the spring and summer version bright, tangy, and genuinely beautiful on a table.
How to Store Protein Cheesecake Cups
Refrigerator Storage
Cover each cup with plastic wrap or a tight-fitting lid and refrigerate for up to 5 days. The filling stays creamy and the crust stays reasonably firm through the full storage period it softens slightly over time as it absorbs moisture from the filling which some people actually prefer. Add fresh fruit toppings immediately before serving rather than during storage so they stay fresh and do not bleed into the filling.
Can You Freeze Them?
Yes, freeze without toppings in individual sealed containers for up to 2 months. Thaw overnight in the refrigerator before serving. The texture after thawing is slightly denser and more compact than fresh, which is not a bad thing — it actually resembles a frozen cheesecake bar more than a traditional cheesecake cup. Add toppings fresh after thawing.
How Long They Last
Five days refrigerated. Two months frozen. The crust is the first thing to change it softens as it sits which is a personal preference thing. If you prefer a crunchier crust add it fresh each time rather than building it into the cups during prep.
Nutrition and Protein Breakdown
Per cup (based on 6 servings with full-fat cream cheese, Greek yogurt, and one scoop vanilla protein powder, approximate):
- Calories: ~220
- Protein: ~16g
- Fat: ~12g
- Carbohydrates: ~18g
- Fiber: ~0g
Numbers shift based on Greek yogurt brand, protein powder, and whether you use full fat or low fat cream cheese. Low fat cream cheese brings the calories down to roughly 180 per cup and the fat to around 7g. Check your specific labels for the most accurate counts.
Frequently Asked Questions
Can I make protein cheesecake cups without protein powder?
Yes. Replace the protein powder with an additional quarter cup of Greek yogurt and a tablespoon of cornstarch to help the filling set. The protein count per cup will drop to around 8 to 10g but the texture and flavor stay very close to the original. It is a good option if you do not have protein powder on hand or want to keep the ingredient list shorter.
What is the best protein powder for cheesecake?
Vanilla casein is the top choice thicker, creamier, and it sets more firmly in the cold. Vanilla whey works well too with a slightly thinner result. Collagen peptides are the most invisible option if you want the protein without any flavor contribution. Avoid plant-based powders with strong flavor profiles like pea protein which can compete with the cream cheese in ways that are not entirely pleasant.
Can I use cottage cheese instead of Greek yogurt?
Yes and it is an excellent swap. Blend the cottage cheese completely smooth before adding it to the filling so there are no visible curds. Full fat cottage cheese gives a slightly richer result than Greek yogurt and adds a subtle savory note that actually enhances the cheesecake flavor. The protein content is comparable so the nutrition numbers stay roughly the same.
How do I keep the cheesecake filling from being too runny?
Three things make sure the cream cheese is room temperature not warm or melted, do not skip the chill time, and check that your protein powder is fully incorporated before pouring into the cups. If the filling is still loose after an hour in the refrigerator, it needs either more time or a slightly higher protein powder ratio next time.
Can I make these ahead of time?
Absolutely and they are actually better made ahead. Build the cups the night before, refrigerate overnight, and add fresh toppings immediately before serving. The filling sets more completely overnight and the flavors meld in a way that a 30-minute chill cannot replicate.
How much protein is in each cheesecake cup?
Approximately 15 to 16g per cup based on this recipe. Adding an extra half scoop of protein powder or swapping to a higher protein Greek yogurt brand can push each cup past 20g without changing the recipe meaningfully.
The Bottom Line
No bake high protein cheesecake cups are the dessert that solves the problem most high protein diets create the moment at the end of the day when you want something that actually tastes like a treat and not like a compromise. Fifteen minutes of work, thirty minutes in the refrigerator, and six individual cheesecakes sitting in your fridge ready for the week. Creamy, tangy, genuinely satisfying, and built around ingredients that are doing real nutritional work underneath all that cheesecake flavor.
Make them Sunday. Thank yourself Thursday.